Note: This article is very old. This tutorial cannot be used for current version of software available at https://www.pramukhime.com
Today I am going to explore various ways to easily type in Indian languages like Bengali, Gujarati, Hindi, Marathi, Sanskrit, Kannada, Malayalam, Oriya, Punjabi, Tamil and Telugu very easily in your favourite CMS Joomla.
There are 3 methods you can use depending on your editor choice.
- Using JCE Editor
- Using FCKEditor
- Using TinyMCE editor
Using JCE Editor
You have to first install JCE Editor along with plugins. It is assumed that JCE editor is your default editor. You can check/set it by going to Administration > Site menu > Global Configuration and look for Default WYSIWYG Editor.
Download Indic IME plugin for TinyMCE and put it at WEBROOT\plugins\editors\jce\tiny_mce\plugins so that “indicime” will become sub-folder of plugins.
Now navigate to Administration > Components > JCE Administration > Plugins. Click on “New Plugin” button on the right side.

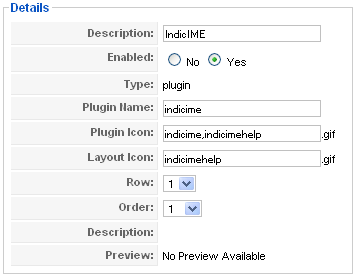
Fill in the form as described below and “Save” the plugin.
Description: IndicIME
Plugin Name: indicime
Plugin Icon: indicime,indicimehelp
Layout Icon: indicimehelp
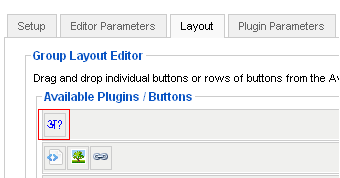
Now navigate to Administration > Components > JCE Administration > Groups. Select the Group(For ex. Default). Go to Layout tab and you will see a button as indicated in image with red square. You can drag this button and drop it in Current Editor Layout anywhere you like and “Save” it.
Now clear browser cache (It is very important) and try to add new article. IndicIME and IndicIME help buttons will show up.
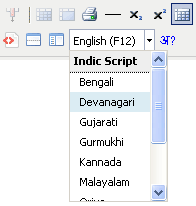
Enjoy typing in Indian languages.
Using FCKEditor
You have to first download FCKEditor for Joomla and install this plugin. It is assumed that FCKEditor is your default editor. You can check/set it by going to Administration > Site menu > Global Configuration and look for Default WYSIWYG Editor.
Download IndicIME plugin for FCKEditor and put it at WEBROOT\plugins\editors\fckeditor\editor\plugins so that “indicime” will become sub-folder of plugins.
Now browse to WEBROOT\plugins\editors\fckeditor\editor and open the file “jtoolbarsetconfig.xml”
At the very bottom, you will get “customplugins” node. Add the following line at the end.
<add name="indicime" lang="en"/>So it will look like this.
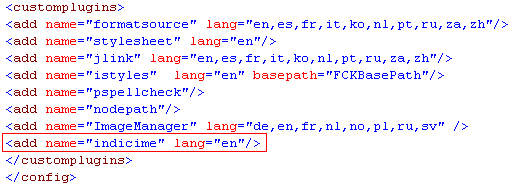
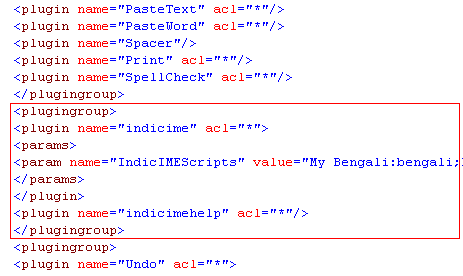
Now when you analyze this xml file, you will notice that it contains button list for three types of toolbars named “Advanced”, “Creative” and “Blog”. In each of these toolbars, you may want to add the IndicIME so find a good place to paste the following code as shown in the image.
<plugingroup>
<plugin name="indicime" acl="*">
<params>
<param name="IndicIMEScripts" value="My Bengali:bengali;My Gujarati:gujarati;My Devnagari: devnagari" />
</params>
</plugin>
<plugin name="indicimehelp" acl="*"/>
</plugingroup>
Using this code, you will be able to customize the language list. If you don’t want to customize the list, remove the text “<params>…</params>”.(Make sure it is “<params>” and not “<param>”)
Now clear browser cache (It is very important) and try to add new article. IndicIME and IndicIME help buttons will show up.

Enjoy typing in Indian languages.
Using TinyMCE Editor
It is assumed that TinyMCE editor is your default editor. You can check/set it by going to Administration > Site menu > Global Configuration and look for Default WYSIWYG Editor.
Download IndicIME plugin for TinyMCE and put it at WEBROOT\plugins\editors\tinymce\jscripts\tiny_mce\plugins so that “indicime” will become sub-folder of plugins.
Now from Administration menu, navigate to Extensions > Plugins > Editor – TinyMCE.
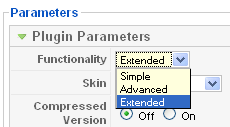
On the right hand side, Open the section “Plugin Parameters” and choose “Extended” Functionality.
Now open the section “Advanced Parameters” and at the very bottom, add “indicime” custom plugin and “indicime,indicimehelp” custom button.

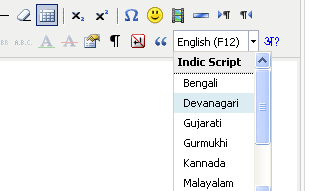
Now when you try to add new article, it will show you IndicIME and IndicIME Help.
Enjoy typing in Indian languages.
Limitation of using TinyMCE is that if you want to customize the list of languages, you need to change php code heavily.
Leave a Reply