As Microsoft got rid of “Record Macro” button from PowerPoint 2013, it is extremely difficult to write a macro for PowerPoint which does what we want to do. Recently, I had a need for having an animation with custom path for a shape. I tried all possible solutions available on the internet and could not get what I wanted. I found two ways to add custom path animation effect for a shape
Method 1: Use following VBA Code
Sub AddStarNoVisiblePath()
	' Note: Change slide index if needed
	' Variables
	Dim shpNew As Shape
	Dim effNew As Effect
	Dim aniMotion As AnimationBehavior

	' Add a new STAR shape at a specified location
	Set shpNew = ActivePresentation.Slides(2).Shapes _
	.AddShape(Type:=msoShape5pointStar, Left:=100, _
	Top:=100, Width:=100, Height:=100)

	' Add custom effect to the shape
	Set effNew = ActivePresentation.Slides(2).TimeLine.MainSequence _
	.AddEffect(Shape:=shpNew, effectId:=msoAnimEffectCustom, _
	Trigger:=msoAnimTriggerWithPrevious)

	' Add Motion effect
	Set aniMotion = effNew.Behaviors.Add(msoAnimTypeMotion)
	effNew.Exit = msoFalse

	' Set Motion Path as square path
	aniMotion.MotionEffect.Path = "M 0 0 L 0.25 0 L 0.25 0.25 L 0 0.25 L 0 0 Z"

End Sub
Explanation
Add a Star shape, create new custom animation effect, set animation as motion and set the motion path
Pros
You can use this trick to create a PowerPoint from scratch without any dependency.
Cons
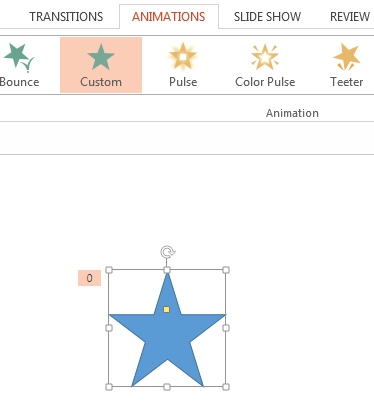
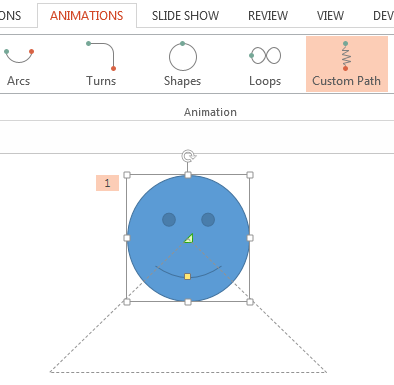
The path is not visible when the shape is selected (Read further down for technical explanation) so you cannot make a change through UI because the animation is marked as “Custom” Entry animation and not “Custom Path” animation as shown in the image below. You must use VBA code to make the change. It makes the maintenance very difficult as you loose the visual clue of the path.

Method 2: Copy existing shape with custom path animation and change path
Prerequisite
You must have the shape with Custom Path animation already set regardless of the path. You may have that shape in the same PowerPoint or in a separate PowerPoint presentation file.
Code
Sub CopySmileyChangePath()
	' NOTE: Change slide and shape index based on where/when you are executing this macro
	' 3rd shape on slide 2 is smiley which has a custom path already defined
	ActivePresentation.Slides(3).Shapes(3).Copy

	' Paste shape in slide 1
	With ActivePresentation.Slides(2).Shapes.Paste
	.Name = "Smiley-" & ActivePresentation.Slides(2).Shapes.Count
	.Left = 200
	.Top = 200
	End With

	' Note: Chnage main sequence index if needed
	' Change shape path to triange
	ActivePresentation.Slides(2).TimeLine.MainSequence(2).Behaviors(1).MotionEffect.Path = "M 0 0 L 0.125 0.216 L -0.125 0.216 L 0 0 Z"

End Sub
Explanation
Copy the desired shape, paste at desired location (pasting shape automatically pastes animation) and change the path
Pros
When the shape is selected, path is visible which gives a visual clue to the user. You can easily change the path if you need to modify it.

Cons
It requires dependency on existing shape with “Custom Path” animation in the same file or in any other file. Sometimes you may not have this liberty.
Why path is not visible in Method 1?
When we use following code, it sets the animation effect as Entry or Exit effect. Default value is msoFalse ( = Entry effect)
effNew.Exit = msoFalseMicrosoft came up with Entry, Exit, Emphasis and Path effects. Out of these four, Entry and Exit can be specified using “Exit” property and Emphasis effect may be derived from the EffectType (not verified by me) but Path effect is the one which cannot be explicitly set using the VBA code. So PowerPoint considers it as an Entry/Exit effect and hence path is not visible.
Hint for developer
effNew.Exit property is setting the value of OpenXml PresetClass which is always “Entry” or “Exit” but not “Path”. If any of the method does not work for you, you can always code in OpenXml and get the desired result.
Leave a Reply