Have you ever had a situation where you needed to change the file extension to uppercase/lowercase in Windows? Here are quick and easy steps to accomplish this task.
How to View File Extension?
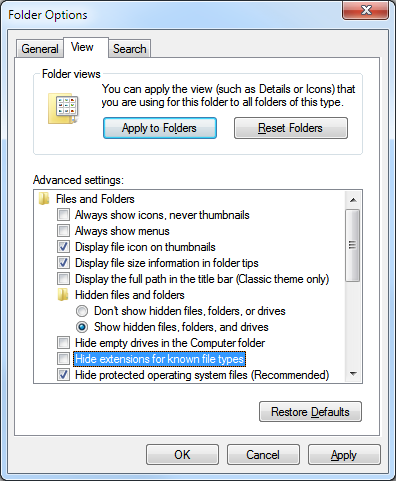
In order to view the file extension in Windows Explorer (aka “My Computer” aka Windows Start menu > Computer), you need to enable the settings.
Go to Windows Explorer and press “ALT” key once which will open up menu (For older version of Windows, this menu is always visible.). Click on “Tools” menu > “Folder Options…”.

Under “View” tab, “Advanced Settings” option, uncheck the box “Hide extensions from known file types” and click “OK” button.

Option 1: Change File Extension to .bak and Change Again to Desired Extension
Within Windows Explorer, right click on the file name, click on “Rename” and change the file extension to .bak and then again change it to uppercase/lowercase.

In this example “.bak” extension is just an example. You may change it to any intermediate extension.
Option 2: Use Command Prompt
This advanced option is for users who know how to use Command Prompt and execute command. When using command prompt, make sure you executing this command in the desired folder.
You can use “rename” command from command prompt. For example, use the following command to change the extension in batch.
rename *.PNG *.pngThis example changes upper case “PNG” extension to lowercase “png” extension.
Option 3: Specify Extension When Saving a New File
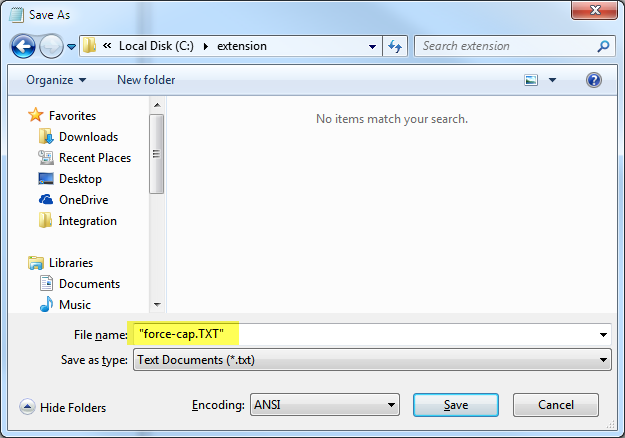
When you create a new file, at the time of saving, you can specify uppercase extension.
If that does not work, wrap the file name with extension in quote character (“). So instead of specifying abc.txt in the Save dialog box, use “abc.txt” (use quote characters around file name).

Option 4: Use “Save As” for Existing File
You can “Save As” existing file and specify the uppercase extension. Use the trick specified in #3 if extension is not retained.

Leave a Reply